Table of Contents
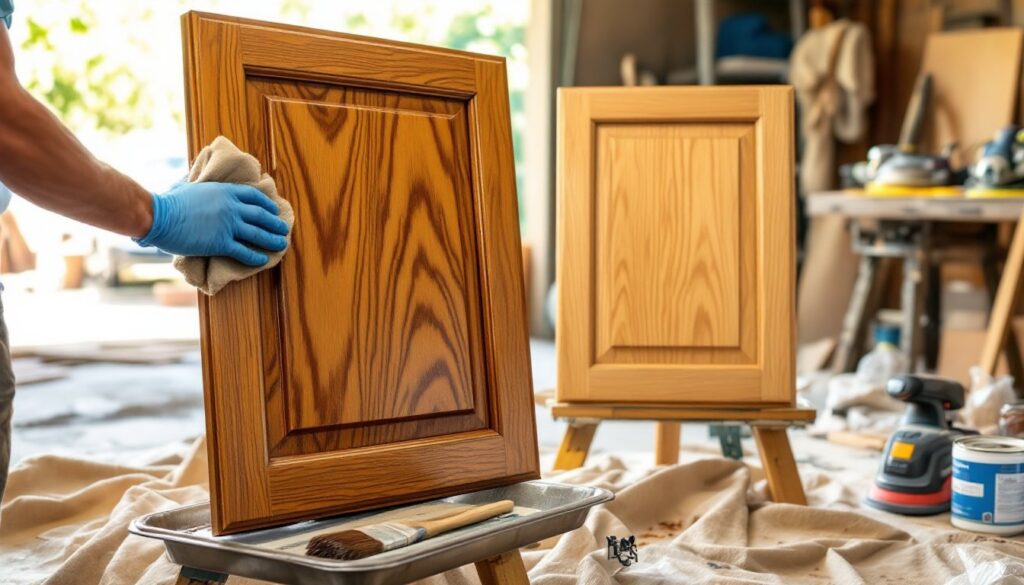
ToggleKitchen cabinets take up more visual real estate than almost anything else in the room. If they’re dated but structurally sound, staining offers a way to bring out natural wood grain and add warmth without the commitment of paint. Unlike painted finishes that sit on the surface, stain penetrates wood fibers and highlights character, knots, rays, and grain patterns that make solid wood worth keeping. This project demands patience and prep work, but a homeowner with basic woodworking skills can complete it in a long weekend. The result? A kitchen that looks custom and high-end without the cost of replacement cabinets.
Key Takeaways
- Staining kitchen cabinets reveals natural wood grain and character while requiring less prep and fewer coats than paint, making it an ideal choice for structurally sound solid wood cabinets.
- Thorough surface preparation—including removing old finishes, sanding with 150-grit then 220-grit sandpaper, and eliminating all dust—determines the final quality of your staining project more than any other single factor.
- Apply pre-stain wood conditioner to pine, birch, and maple before staining to prevent blotchy results, then apply stain liberally along the grain while maintaining a wet edge for even color.
- Seal stained cabinets with polyurethane topcoat (most durable), polycrylic (water-based alternative), or lacquer to provide essential protection against moisture, grease, and daily wear.
- A confident homeowner with basic woodworking skills can complete staining kitchen cabinets in a long weekend using proper materials, tools, and techniques without the expense of cabinet replacement.
Why Stain Instead of Paint Your Kitchen Cabinets?
Paint hides wood grain entirely, which makes it ideal for laminate, MDF, or mismatched doors. Stain, on the other hand, works only on real wood, solid hardwood or veneer, and its main advantage is showcasing that material. If cabinets are oak, maple, cherry, or birch with attractive grain, stain brings out depth and texture that paint erases.
Stain is also more forgiving during touch-ups. A ding in painted cabinetry often requires sanding, priming, and repainting to blend. With stain, a light sand and reapplication of matching stain and topcoat usually disappears. That said, stain won’t cover existing damage or color variation the way paint does. If the wood has water stains, filler patches, or mismatched door replacements, paint is the better choice.
Finally, stain typically requires fewer coats than paint. Most projects need one or two applications of stain followed by a protective topcoat, while paint often demands primer, two coats of paint, and sometimes a topcoat. The trade-off: stain requires more aggressive surface prep since it won’t fill minor imperfections.
Materials and Tools You’ll Need for Cabinet Staining
Gather everything before starting. Mid-project hardware store runs waste time and let dust settle on wet stain.
Materials:
- Wood stain in the desired color (oil-based stains offer longer open time for blending: water-based stains dry faster and clean up with soap and water)
- Pre-stain wood conditioner (essential for softwoods and blotchy species like pine or birch)
- Polyurethane, polycrylic, or lacquer topcoat (satin or semi-gloss sheens hold up better in kitchens than matte)
- 220-grit sandpaper and 150-grit sandpaper
- Tack cloth or microfiber rags
- Denatured alcohol or TSP (trisodium phosphate) for cleaning
- Mineral spirits (if using oil-based products)
- Disposable gloves (nitrile resists solvents better than latex)
Tools:
- Foam brushes or natural-bristle brushes for stain application
- Clean, lint-free rags for wiping excess stain
- Paint tray or small containers for working stain
- Random orbital sander or sanding block
- Drill/driver with appropriate bits for hardware removal
- Painter’s tape and drop cloths
- Sawhorses or a flat work surface for laying doors flat
Safety Gear:
- Nitrile gloves
- Safety glasses
- Respirator rated for organic vapors (especially with oil-based stains and topcoats: a dust mask won’t cut it)
- Hearing protection if using a power sander for extended periods
Preparing Your Kitchen Cabinets for Staining
Surface prep determines the final result more than stain quality or application technique. Rushed prep shows through immediately.
Removing Doors, Hardware, and Cleaning
Label every door and drawer front as it comes off. A piece of painter’s tape on the back with a number or location (“upper left,” “drawer 3”) prevents mismatched reinstallation. Remove all hinges, knobs, and pulls. Store hardware in labeled bags, mixing up screws wastes time during reassembly.
Clean all surfaces with TSP or a degreaser cut with water. Kitchens accumulate a film of cooking oil, even in spots that look clean. This film blocks stain penetration and causes blotchy results. Wipe down with a damp rag, then let everything dry completely, at least two hours in low humidity, longer if the air is damp.
If the cabinets have an existing finish (polyurethane, varnish, or old stain), it must come off. Stain won’t penetrate a sealed surface. Use a chemical stripper for thick, old finishes, or plan on heavy sanding. Many DIY woodworking projects rely on proper surface prep to achieve professional results, and cabinets are no exception.
Sanding Techniques for a Smooth Finish
Start with 150-grit sandpaper to remove the existing finish and level any rough spots. A random orbital sander speeds the process on flat door panels and frames, but hand-sand profiled edges, routed details, and inside corners to avoid rounding over crisp lines. Sand with the grain whenever possible: cross-grain scratches telegraph through stain.
Once the old finish is gone and the surface feels uniformly dull, switch to 220-grit for a final pass. This smooths out sanding scratches left by the coarser grit. The wood should feel silky, not fuzzy. If it feels fuzzy, the grain has raised, wipe it lightly with a damp rag, let it dry, and sand again with 220-grit.
After the final sand, vacuum all surfaces and wipe everything down with a tack cloth. Any dust left behind will mix with wet stain and create a gritty texture. Don’t skip this step.
Applying Stain to Your Kitchen Cabinets
Work in a well-ventilated space, open windows and run a fan, but don’t aim it directly at wet stain (it can cause uneven drying). Lay cabinet doors flat on sawhorses. Staining vertical surfaces leads to drips and uneven color.
If the wood is pine, birch, or maple, apply a pre-stain wood conditioner first. These species absorb stain unevenly without it, resulting in blotchy, amateurish results. Follow the conditioner’s instructions, most require 15 minutes to two hours of dry time before staining.
Stir the stain thoroughly but don’t shake it (shaking creates bubbles). Pour a small amount into a tray. Dip a foam brush or rag into the stain and apply it liberally along the grain, working in sections no larger than one door panel at a time. The key is keeping a wet edge, if one section dries before blending into the next, the line shows.
Let the stain sit for the time recommended on the can, usually 5 to 15 minutes, then wipe off the excess with a clean, lint-free rag. The longer stain sits, the darker it gets, but leaving it too long can make it tacky and hard to wipe evenly. Many experienced woodworkers follow traditional staining methods that emphasize consistent wipe-off timing for uniform color.
Wipe in the direction of the grain with moderate pressure. The goal is an even color with no puddles, drips, or dark spots. Inspect the piece from different angles under good light, missed spots are easier to catch wet than after the stain dries.
If the first coat looks too light, apply a second coat after the first dries completely (check the can for recoat times, typically 2–4 hours for water-based, 8–24 hours for oil-based). Don’t try to darken stain by leaving excess on the surface: it won’t cure properly and will remain sticky under the topcoat.
Sealing and Protecting Your Newly Stained Cabinets
Stain has no protective properties on its own. Without a topcoat, it’ll rub off with normal use. The topcoat does the heavy lifting: resisting moisture, grease, and daily wear.
Polyurethane (oil-based) is the most durable option and the standard for kitchen cabinets. It dries hard, resists water and heat, and holds up to scrubbing. The downside: it yellows slightly over time (which can enhance warm wood tones but looks off on cooler stains) and requires mineral spirits for cleanup. It also takes longer to cure, plan on 24 hours between coats and a full week before reinstalling hardware and closing doors without sticking.
Polycrylic (water-based polyurethane) dries clear, doesn’t yellow, and cleans up with water. It dries faster, usually recoatable in 2 hours, but it’s not quite as durable as oil-based poly. For cabinets that won’t see heavy abuse, it’s a solid choice.
Lacquer dries fast and hard, but requires spray equipment for a professional finish and puts off strong fumes. It’s overkill for most DIY cabinet projects unless someone already has an HVLP sprayer and a well-ventilated workspace.
Apply the first coat of topcoat with a high-quality synthetic brush (for water-based) or natural bristle brush (for oil-based). Brush with the grain in long, smooth strokes. Avoid overworking the finish, too much brushing creates bubbles and brush marks. Let the first coat dry, then lightly sand with 220-grit sandpaper to knock down any raised grain or dust nibs. Wipe with a tack cloth and apply a second coat. Most projects need two to three coats for adequate protection.
For those interested in expanding their skillset, many step-by-step project guides cover finishing techniques that translate well across different materials. Once the final coat cures, reinstall doors and hardware. Give the finish a few extra days to harden fully before slamming doors or stacking dishes inside. Freshly cured finishes can still mar or stick if stressed too soon.