Table of Contents
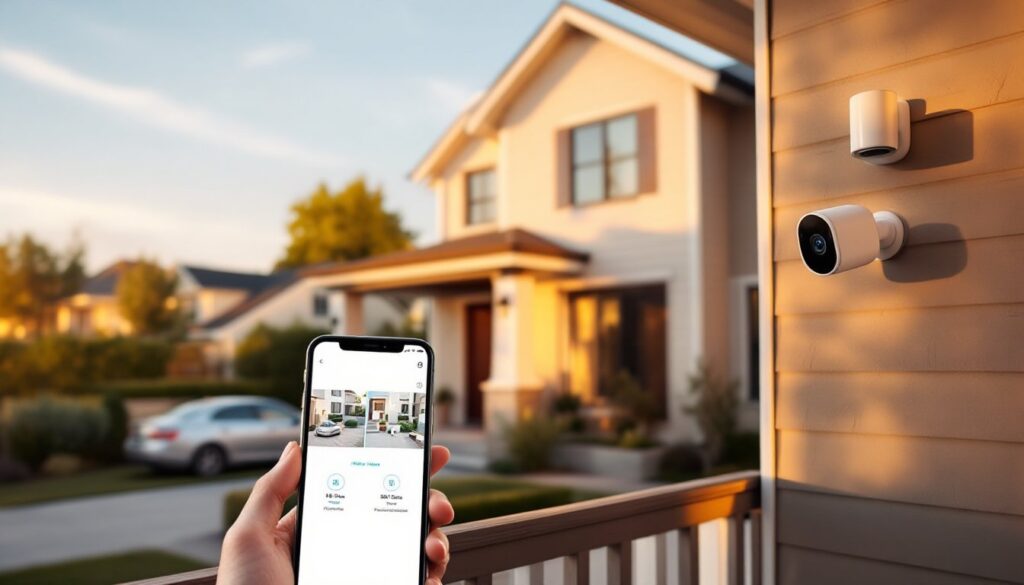
ToggleWireless security cameras have gone from luxury tech to practical home protection in just a few years. No drilling through walls to snake cables, no electrician bills, and you’re not married to a single monitoring company. These systems use Wi-Fi or proprietary wireless protocols to transmit footage, drawing power from batteries, solar panels, or outdoor-rated low-voltage wiring. With video doorbells, floodlight cams, and indoor monitors all talking to one app, homeowners can cover entry points, driveways, and package drop zones without running a single wire through their siding. That flexibility makes wireless setups ideal for renters, older homes where fishing cable would mean tearing into plaster, or anyone who wants cameras up this weekend rather than waiting on an installer.
Key Takeaways
- A wireless security camera system eliminates the need for extensive wiring by using Wi-Fi or proprietary protocols to transmit footage, while drawing power from batteries, solar panels, or outdoor outlets.
- Wireless camera systems offer superior flexibility and easier expansion compared to wired setups, allowing homeowners to relocate cameras, cover multiple entry points, and scale up without upgrading infrastructure.
- Choose 1080p video quality with 130° field of view and HDR processing for optimal face recognition and coverage, while evaluating between cloud storage for accessibility and local storage for privacy and cost savings.
- Proper placement at 7–9 feet high with 15–30 degree downward angles, strong Wi-Fi signal testing, and secure mounting to solid substrates are essential for effective wireless security camera installation.
- Consider your climate, Wi-Fi range, smart home ecosystem compatibility, and long-term subscription costs when selecting a wireless security camera system to ensure reliability and alignment with your home’s specific needs.
What Is a Wireless Security Camera System and How Does It Work?
A wireless security camera system skips the coax or Ethernet cables that traditional CCTV relies on. Instead, each camera connects to your home network via Wi-Fi (2.4 GHz or 5 GHz) or a proprietary hub that bridges to your router. The camera’s image sensor captures video, the onboard processor compresses it (usually H.264 or H.265 codec), and the wireless radio transmits that stream to cloud servers, a local base station, or directly to your phone.
Power is the second half of the equation. Battery-powered models use rechargeable lithium packs that last anywhere from two months to a year, depending on motion-trigger frequency and temperature. Solar-trickle kits extend battery life indefinitely in sunny climates. Plug-in wireless cameras still need a nearby outlet but eliminate data cabling, useful for eaves with exterior GFCI receptacles. A few high-end models support Power over Ethernet (PoE), which isn’t truly wireless but lets you pull a single Cat6 cable for both data and power if your attic or crawl space makes that easier than running 120 V romex.
Modern systems often include integration with smart security systems that coordinate cameras, door sensors, and smart locks through a single interface. When motion is detected, the camera wakes from standby, records a clip, and pushes a notification. Two-way audio lets homeowners speak through the camera’s built-in speaker. Some systems use passive infrared (PIR) sensors to reduce false alerts from trees swaying, while AI-powered models distinguish between people, pets, and vehicles before sending an alert.
Key Benefits of Going Wireless for Home Security
No wiring through finished walls. Fishing cable through insulation, drywall, and top plates is slow work. Wireless cameras mount in minutes with two screws and a plastic anchor, making them renter-friendly and perfect for homes with plaster-and-lath construction where drilling is a gamble.
Flexible placement and relocation. Want to monitor the side gate during a party, then move the camera to watch the driveway during the week? Pop it off the mount and re-aim it. Battery power means coverage anywhere, sheds, detached garages, or fence posts fifty feet from the house.
Easier expansion. Adding a fifth or sixth camera to a wired system often means pulling new cable and upgrading the DVR. Wireless systems scale by pairing another camera to the app, assuming your router and internet upload speed can handle the extra streams. A typical 1080p camera at 15 fps uses about 1–2 Mbps upload, so a four-camera setup needs at least 8 Mbps upload to avoid stuttering.
Smart home integration. Wireless cameras pair easily with voice assistants, smart displays, and automation routines. Tell Alexa to show the front door on your Echo Show, or have the porch light flip on when the camera detects motion after sunset.
Lower upfront cost. Entry-level wireless kits start around $150 for two cameras and a hub. Professional wired installations often begin at $500 before labor. That said, cloud storage subscriptions add up, budget $3 to $10 per camera per month if local storage isn’t an option.
Essential Features to Look for in a Wireless Security Camera System
Video Quality and Night Vision Capabilities
1080p (1920×1080) remains the sweet spot for most homeowners, sharp enough to identify faces at fifteen feet without overwhelming your network or storage quota. 2K and 4K models deliver finer detail (license plates, package labels), but file sizes double or triple, eating bandwidth and shortening battery life. Choose higher resolution for critical choke points like front doors: stick with 1080p for wide-angle garage views.
Field of view (FOV) ranges from 110° to 160°. Wider lenses cover more ground but distort edges (fisheye effect) and reduce pixel density at distance. A 130° FOV balances coverage and clarity for most doorways and driveways.
Night vision comes in two flavors. Infrared (IR) LEDs illuminate up to 30 feet in monochrome, invisible to the human eye but visible as a faint red glow on the camera face. Color night vision uses a low-light CMOS sensor or an integrated spotlight to capture full color, helpful for identifying clothing or vehicle paint. Spotlights deter prowlers but annoy neighbors if aimed poorly, angle them downward and enable motion-only triggers.
High dynamic range (HDR) and wide dynamic range (WDR) processing help cameras handle backlit scenes, like a person standing in a sunlit doorway. Without it, the camera either blows out the background or silhouettes the subject.
Storage Options: Cloud vs. Local Recording
Cloud storage uploads clips to the manufacturer’s servers, accessible from any device with your login. It survives theft, a burglar can’t steal footage if it’s already offsite, and supports longer retention (7, 14, or 30 days). The downside is recurring fees and reliance on internet upload speed. A power outage or ISP hiccup means no recording until connectivity returns. Privacy-conscious users should verify end-to-end encryption and check whether law enforcement can request footage without a warrant.
Local storage writes to a microSD card in the camera or a base station with a hard drive. One-time cost, no monthly bill, and footage stays on your property. Capacity is finite, a 128 GB microSD holds about two weeks of motion clips at 1080p before overwriting the oldest files. Base stations with 1 TB or 2 TB drives support multiple cameras for months. The risk: if someone swipes the camera or hub, your evidence goes with it. Mounting cameras above head height and using tamper-resistant screws (Torx or security hex) mitigates this.
Some systems offer hybrid storage, uploading important events to the cloud while keeping a full archive locally. That redundancy costs more but balances convenience and privacy. Many leading home security systems now support both options in a single platform.
How to Choose the Right Wireless Security Camera System for Your Home
Start by mapping coverage zones. Walk your property at dusk and note blind spots: side gates, basement windows, the gap between the garage and fence. Count how many cameras you’ll need, four to six typically covers a single-family home’s entry points and high-value areas.
Check your Wi-Fi range. Wireless cameras are only as reliable as the signal they receive. Exterior walls, stucco with metal lath, and brick all attenuate 2.4 GHz more than drywall. If your router sits in a central closet and the driveway camera will be sixty feet away through two exterior walls, plan to add a Wi-Fi extender or mesh node near that side of the house. Some camera systems include a dedicated hub that acts as a wireless repeater, improving range.
Decide on power. Battery models work anywhere but require recharging or battery swaps every few months. Cold weather (below 32°F) cuts lithium run time by 30 to 50 percent. Solar panels (typically 2–5 watts) pair with batteries to maintain charge in climates averaging four hours of sunlight daily. Wired wireless cameras (yes, that’s confusing) plug into outdoor outlets and never need charging, ideal for eaves with existing exterior receptacles.
Evaluate integration. If you already run Alexa, Google Home, or Apple HomeKit, choose cameras with native support. Some budget brands require proprietary apps that don’t talk to anything else. Advanced users may want ONVIF compatibility, an open protocol that lets third-party software (Blue Iris, Home Assistant) pull camera streams.
Read independent reviews on platforms like CNET or Digital Trends to compare real-world performance, app quality, and customer support responsiveness. Manufacturer claims about battery life and night-vision range often assume ideal conditions, actual results vary with motion frequency, temperature, and Wi-Fi signal strength.
Finally, budget for subscriptions if cloud storage matters to you. A $200 camera kit with mandatory $10/month per camera fees becomes a $680 two-year cost. Compare that to a pricier upfront system with free local storage.
DIY Installation Tips for Wireless Security Cameras
Plan placement before drilling. Use painter’s tape to mark camera positions, then view the live feed on your phone while standing in each spot. Aim for 7 to 9 feet high, low enough to capture faces, high enough to deter tampering. Angle cameras 15 to 30 degrees downward: too steep and you’ll see the tops of heads, too shallow and hats obscure faces.
Test Wi-Fi signal strength at each location using your phone’s camera app or the manufacturer’s signal meter. If bars drop below 50 percent, relocate the camera or add a mesh node. A weak signal causes stuttering video and missed motion events.
Mount to solid substrate. Vinyl siding flexes, making cameras sag or vibrate in wind. Locate a stud or sheathing seam with a stud finder, or use a mounting block, a small PVC or wood box that screws into framing and gives you a flat, stable surface. For brick or stucco, use concrete anchors (tapcons or sleeve anchors) sized for the fastener: typically #8 or #10 screws. Pre-drill with a masonry bit one size smaller than the anchor diameter.
Seal penetrations. Even battery cameras have a mounting bracket with screw holes. Dab silicone caulk (clear or color-matched) around each fastener and along the bracket’s top edge to prevent water intrusion. For plug-in models running through an exterior wall, use a weatherproof cable gland or wire-in box with a spring-loaded cover.
Aim away from direct sun and reflective surfaces. A camera pointed east will be blinded by sunrise: one facing a white garage door at noon will wash out. Use the app’s exposure or HDR settings to compensate, or reposition the camera to shoot at an angle.
Enable motion zones to reduce false alerts. Draw detection boxes around doors and walkways, excluding trees, flags, and street traffic. Set sensitivity mid-range and adjust after a few days of real-world alerts.
Wear appropriate PPE. Use safety glasses when drilling overhead, work gloves when handling metal anchors, and ear protection if running a hammer drill into masonry for more than a few holes. If you’re working above eight feet, set up a stable stepladder and have someone foot it.
Some homeowners add two-way audio smart cameras to communicate with visitors or delivery drivers in real time. Test the microphone and speaker volume after installation, wind noise and traffic can drown out conversation, so position the camera where ambient sound is manageable.
Sync all cameras to the same app account and label them clearly (Front Door, Driveway, Side Gate). Configure push notifications so critical zones alert immediately while lower-priority areas log silently. Update firmware as soon as patches release, security vulnerabilities in camera software make headlines regularly, and manufacturers issue fixes to close those gaps.