Table of Contents
ToggleA grimy grout line or soap scum buildup in your shower doesn’t need to be a weekend-ruining scrubbing session. The right shower cleaner brush cuts through years of mineral deposits and film in a fraction of the time, saving your knees and your patience. Whether you’re tackling textured fiberglass, ceramic tile, or glass enclosures, matching the brush type to your surface and cleaning routine makes all the difference. This guide breaks down the options, features, and techniques that turn bathroom cleaning from a chore into a quick maintenance task.
Key Takeaways
- A shower cleaner brush with stiff bristles and a long telescoping handle cuts scrubbing time in half compared to hand sponges by physically dislodging mold, mineral deposits, and soap scum without requiring excessive physical effort.
- Choose brush bristle stiffness based on your surface: stiff nylon for ceramic and porcelain tile, soft bristles for acrylic and fiberglass to avoid scratching.
- Electric shower cleaner brushes rotating at 200-300 RPM are ideal for large showers or users with limited grip strength, while manual brushes suffice for weekly maintenance under 50 square feet.
- Let chemical cleaners dwell for 3-5 minutes before scrubbing, then scrub top-to-bottom using circular motions on flat surfaces and straight strokes along grout lines for best results.
- Store your brush bristle-side up and disinfect weekly with white vinegar solution to prevent mold growth and extend its lifespan to 6-12 months with proper maintenance.
- Look for replaceable brush head designs, water-resistant IPX6+ ratings for electric models, and ergonomic grip materials to ensure durability and comfort during extended cleaning sessions.
Why a Shower Cleaner Brush Is a Game-Changer for Your Bathroom
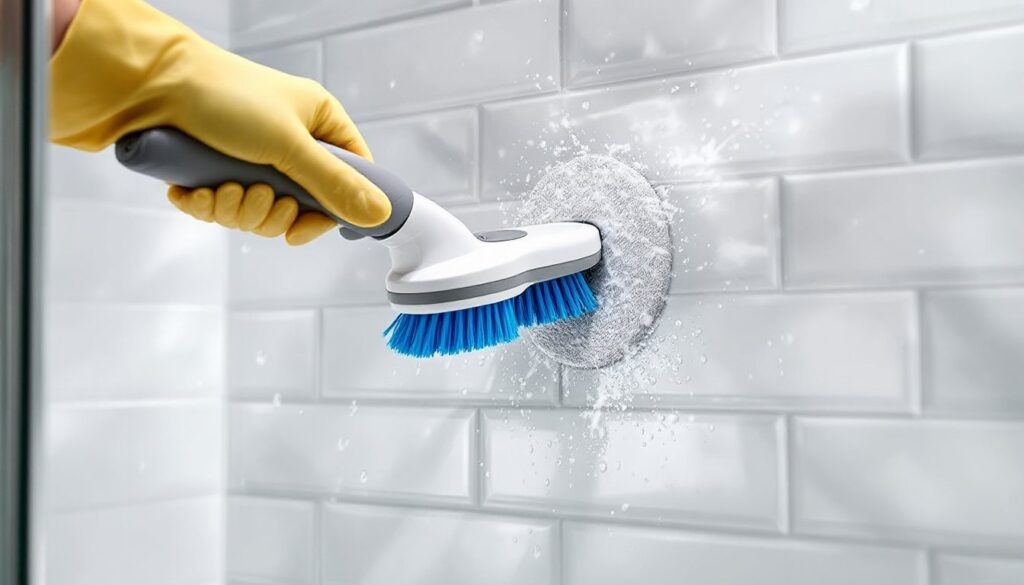
Standard sponges and rags push dirt around more than they remove it, especially on non-slip shower floors and grout joints. A purpose-built shower brush uses stiff bristles or abrasive pads to physically dislodge mold, mildew, and mineral scale that cling to textured surfaces.
Ergonomics matter more than you’d think. Scrubbing at arm’s length with a short-handled sponge strains your wrist and shoulder. A brush with a 48- to 60-inch telescoping handle lets you clean ceiling corners and baseboards without stepping into the wet shower or balancing on a stepladder.
Bristles also dry faster than foam, which means less bacterial growth between uses. Look for nylon or polypropylene bristles rated for wet environments, they resist mildew and won’t scratch acrylic or fiberglass. For natural stone or polished marble, softer boar-hair or synthetic microfiber heads prevent etching.
If you’ve been putting off cleaning because it’s physically exhausting, the right brush changes that equation. Most homeowners report cutting their scrubbing time by half once they switch from a hand sponge to a long-handle or powered brush.
Types of Shower Cleaner Brushes: Find Your Perfect Match
Manual vs. Electric Shower Brushes
Manual brushes are the workhorse option, no batteries, no charging, and they last for years. A quality dual-sided scrub brush with stiff bristles on one face and a scouring pad on the other handles most tile and grout jobs. Expect to spend $12–$25 for a solid manual model with a replaceable head.
Electric or battery-powered spin scrubbers do the heavy lifting for you. These tools rotate at 200–300 RPM, cutting through soap scum with minimal pressure. They’re especially helpful if you have arthritis, limited grip strength, or large walk-in showers. Many electric cleaning brushes with rotating heads come with multiple attachments: a flat pad for walls, a pointed brush for grout lines, and a dome brush for curved fixtures.
Downsides: electric models weigh 2–3 pounds, which adds arm fatigue on big jobs, and you’ll need to recharge every 45–90 minutes of run time. Budget $40–$80 for a mid-range cordless scrubber. If your shower is under 50 square feet and you clean it weekly, a manual brush is usually enough.
Long-Handle Brushes for Hard-to-Reach Areas
Shower ceilings, tile above the showerhead, and floor corners are notorious dust and mildew traps. A telescoping handle brush extends from 30 inches to 60 inches, eliminating the need for a step stool.
Look for models with a pivoting head, it lets you angle the bristles flat against the ceiling or vertical for walls without repositioning your stance. Aluminum or fiberglass poles are lighter than steel and won’t rust in a damp bathroom.
Some designs include a squeegee edge on the brush head, so you can scrub and dry in one pass. This is a time-saver on glass doors, where water spots form within minutes of rinsing.
Key Features to Look for When Buying a Shower Cleaner Brush
Bristle stiffness should match your surface. Porcelain and ceramic tile tolerate stiff nylon bristles (often labeled “heavy-duty” or “scrubbing”). Acrylic tubs, fiberglass pans, and cultured marble need medium or soft bristles to avoid micro-scratches that collect grime over time.
Replaceable heads save money and reduce waste. A handle lasts years, but bristles wear out after 20–30 deep cleans. Brands that sell interchangeable brush pads (usually $5–$8 each) are worth the upfront cost.
Water drainage holes in the brush head prevent standing water, which breeds mold. Flip the brush upside down after each use, if water pools in the bristle base, it’s poorly designed.
Handle grip material matters in a wet environment. Rubberized or textured plastic grips stay secure even with soapy hands. Bare plastic or wooden handles get slippery and can crack if left in standing water.
For electric models, check the IPX rating. An IPX6 or IPX7 rating means the motor housing is water-resistant enough for shower spray. Anything lower risks short-circuiting if you accidentally drop it or spray it directly.
Weight distribution is easy to overlook. Hold the brush at arm’s length before buying, if it feels front-heavy, your wrist will fatigue quickly. A well-balanced brush keeps the center of gravity near your hand.
How to Use Your Shower Cleaner Brush for Best Results
Pre-wet the surface and apply cleaner first. Scrubbing dry tile doesn’t lift dirt, it just grinds it into the grout. Spray your cleaner (alkaline for soap scum, acidic for hard water stains) and let it dwell for 3–5 minutes. This breaks down the bonds between minerals and tile, so the brush only needs to wipe them away.
Many homeowners adopt cleaning techniques that prioritize top-to-bottom workflow: start at the ceiling or top tile row, work downward, and finish with the floor pan. Gravity pulls loosened grime down, so you’re not re-dirtying cleaned areas.
Use circular motions on flat surfaces, straight strokes on grout lines. Grout is recessed between tiles, scrubbing side-to-side skips over it. A pointed grout brush (or the edge of a flat brush) run along the joint lifts embedded mold.
For electric brushes, let the tool do the work. Press lightly and move slowly, about 1 inch per second. Pushing hard bogs down the motor and doesn’t improve cleaning. If a spot won’t budge, reapply cleaner and give it another dwell period.
Rinse thoroughly. Leftover cleaner residue attracts dirt faster than a clean surface. Use a handheld showerhead or a bucket of clean water to rinse from top to bottom, then squeegee or towel-dry glass doors to prevent spotting.
Ventilate during and after cleaning. Run the exhaust fan or crack a window. Most bathroom cleaners (especially those with bleach or ammonia) release fumes that irritate lungs in enclosed spaces. Wear nitrile gloves to protect your hands from caustic formulas, and consider safety goggles if you’re scrubbing overhead, drips happen.
Maintenance Tips to Extend Your Brush’s Lifespan
Rinse the brush head immediately after each use. Leftover cleaner and grime dry into the bristles, making them stiff and less effective. Hold the brush under warm running water and work your fingers through the bristles to flush out trapped debris.
Disinfect weekly. Soak the brush head in a solution of 1 part white vinegar to 2 parts water for 10 minutes, or run it through a dishwasher cycle (top rack, no heated dry). This kills mold spores and bacteria that accumulate in damp bristles.
Store the brush bristle-side up or hanging. Laying it flat on a shelf traps moisture against the bristles and promotes mildew. A simple adhesive hook on the shower wall or utility closet keeps it dry between uses, following the same home organization principles that keep other cleaning tools accessible and sanitary.
For electric models, remove the battery or store it off the charger if you won’t use it for more than two weeks. Lithium-ion batteries degrade faster when left at 100% charge in humid environments. Wipe down the motor housing with a dry cloth after each use, water intrusion is the most common failure point.
Replace bristles when they splay or flatten. Once the tips curl outward or lose their shape, they stop scrubbing effectively and can scratch surfaces. Most manual brush heads last 6–12 months with weekly use: electric brush pads wear out faster due to high-speed friction, typically every 3–6 months.
Check telescoping poles for grit in the extension mechanism. Rinse and dry the joints every few months to prevent calcium buildup from locking the pole in place.