Table of Contents
ToggleTeak stands out in bathroom design for a simple reason: it doesn’t quit. While other hardwoods warp, rot, or crack in humid conditions, teak holds steady, thanks to natural oils that resist moisture and decay. It’s the same wood used on boat decks, outdoor furniture, and commercial spas, places where failure isn’t an option. In the bathroom, a teak vanity combines durability with a warm, organic aesthetic that works in everything from modern minimalist spaces to traditional designs. This guide walks through what makes teak the smart choice for a bathroom vanity, how to pick the right one, and what it takes to keep it looking sharp for decades.
Key Takeaways
- Teak bathroom vanity wood resists moisture, warping, and mold naturally due to its high silica content and natural oils, making it more durable than standard hardwoods in humid bathroom environments.
- A teak bathroom vanity should last 20+ years with proper care, and when amortized over that lifespan, offers better long-term value than cheaper particleboard options requiring replacement every 5–10 years.
- Proper installation requires securing wall-mounted units to wall studs with appropriate fasteners, checking floor level with shims, and sealing all perimeters with silicone caulk to prevent water damage.
- Daily maintenance for your teak vanity involves wiping spills with soft cloths and cleaning with mild soap and water, while periodic oil reapplication every 6–12 months restores protection and luster.
- When selecting a teak vanity, prioritize Grade A heartwood construction with dovetail or mortise-and-tenon joints, and verify sink compatibility and space requirements before purchasing.
Why Choose Teak for Your Bathroom Vanity?
Teak brings specific advantages to a bathroom environment that most hardwoods can’t match. The wood’s high silica content and natural oil production create a built-in defense system against water damage, fungal growth, and insect infestation. Unlike pine, oak, or maple, which require heavy sealing and still face moisture problems, teak performs without constant intervention.
Beyond water resistance, teak offers dimensional stability. Where humidity swings cause many woods to expand and contract (leading to warped doors, stuck drawers, and cracked panels), teak moves minimally. That stability matters when you’re mounting hardware, installing drawers, or counting on doors to align properly year after year.
The wood’s density also translates to longevity. A well-built teak vanity should outlast most other bathroom fixtures. It’s a material choice that makes sense when you’re planning to stay put or want to add genuine value to a home.
Natural Water Resistance and Durability
Teak’s water resistance comes from two sources: tight grain structure and natural oils (primarily tectoquinone). The grain minimizes water penetration, while the oils actively repel moisture. This combination is why teak has been the go-to for marine applications since the age of sail.
In practical terms, this means splashes, steam, and humidity won’t compromise the wood’s integrity. You don’t need to panic over a wet towel left on the vanity or condensation from a hot shower. That said, standing water should still be wiped up, teak is water-resistant, not waterproof, and pooled water can eventually affect any finish applied to the surface.
Teak also resists mold and mildew naturally. The oils that repel water also discourage microbial growth, which is a key advantage in bathrooms where ventilation isn’t always ideal. For households dealing with high humidity or older homes with limited exhaust fans, this characteristic provides a real performance edge over standard hardwood or MDF vanities.
Teak Bathroom Vanity Styles and Design Options
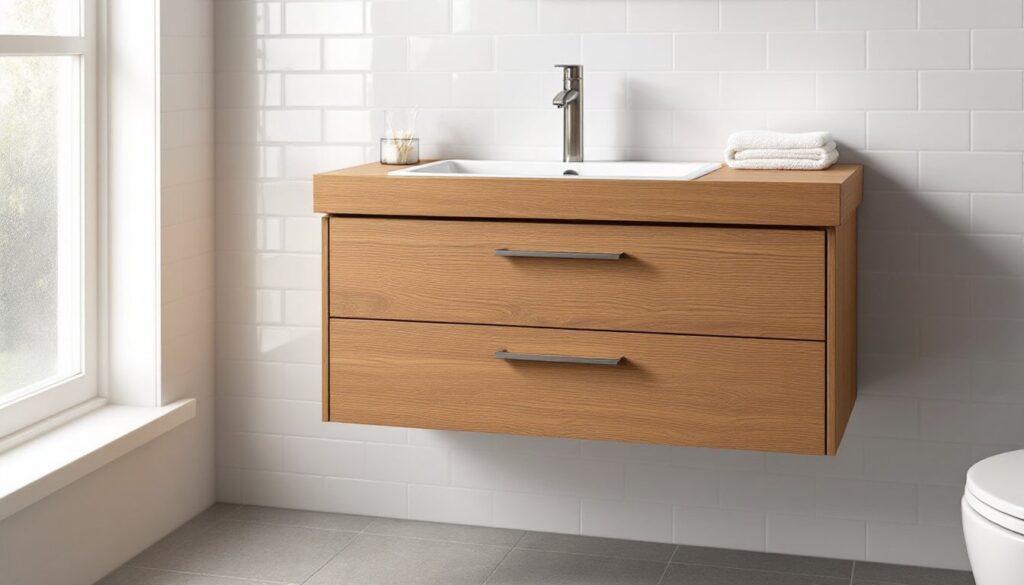
Teak vanities come in a range of styles, from clean-lined modern pieces to traditional designs with turned legs and detailed hardware. The wood’s natural color, a warm golden brown when fresh, aging to silvery gray if left untreated, fits multiple design directions.
Modern and minimalist designs often feature flat-panel doors, integrated handles, and simple hardware. These vanities emphasize the wood grain itself, using oil or matte sealers to protect the surface without adding gloss. Floating or wall-mounted teak vanities work well in contemporary bathrooms, pairing with vessel sinks and frameless mirrors.
Traditional and transitional styles incorporate raised panels, visible joinery, or decorative corbels. These designs lean on teak’s richness and pair well with undermount sinks, polished nickel faucets, and classic tile work. Many homeowners appreciate design inspiration from trusted sources when matching wood tones with fixtures and finishes.
Freestanding vs. wall-mounted: Freestanding teak vanities provide storage and visual weight, anchoring smaller bathrooms. Wall-mounted units create a floating effect, making cleaning easier and contributing to a spacious feel. The choice depends on floor type (tile is straightforward: radiant-heated floors may complicate freestanding installation) and desired aesthetic.
Single vs. double sink configurations: Measure your space carefully. A double-sink teak vanity typically requires at least 60 inches of wall space for comfortable use, with 72 inches being more practical. Single-sink vanities start around 24 inches but work best at 30 to 36 inches for adequate counter and storage space.
How to Select the Right Teak Vanity for Your Space
Choosing a teak vanity starts with accurate measurements and an honest assessment of your bathroom layout. Measure the available wall space, noting locations of plumbing stubs, electrical outlets, and any obstructions (baseboard heaters, windows, door swings). Account for door and drawer clearance, a vanity drawer that hits the toilet when opened is a daily frustration.
Grade and construction quality matter. Look for Grade A teak, sourced from the heartwood, which contains the highest concentration of natural oils. Lower grades use more sapwood, which is lighter in color and less resistant to moisture. Check joinery: dovetail or mortise-and-tenon joints outlast butt joints secured only with screws and glue. Drawer boxes should be solid wood (or quality plywood), not particleboard.
Finish options include oil, varnish, or lacquer. An oil finish (like tung oil or Danish oil) enhances the wood’s natural appearance and simplifies touch-ups but requires reapplication every 6 to 12 months. Varnish or polyurethane provides a more durable barrier but can yellow over time and requires sanding for repair. Some homeowners prefer leaving teak unfinished to let it weather naturally to a silver-gray patina, though this approach is more common outdoors.
Sink compatibility: Verify whether the vanity is designed for a top-mount (drop-in), undermount, or vessel sink. Not all vanities accommodate all sink types. If you’re reusing an existing sink, bring measurements, or better yet, the actual sink, when shopping. Faucet drilling matters too: some vanity tops come pre-drilled, others require custom drilling based on your faucet’s spread (4-inch centerset, 8-inch widespread, or single-hole).
Storage needs: Evaluate what you’ll store. Deep drawers work well for towels and toiletries: adjustable shelves suit cleaning supplies and bulk items. Soft-close hinges and drawer glides add cost but reduce wear and noise, worth it for daily-use furniture.
Installation Tips for Teak Bathroom Vanities
Installing a teak vanity follows standard cabinet installation practices, with a few considerations specific to the material’s weight and the bathroom environment.
Preparation steps:
- Turn off water supply at the shutoff valves or main line.
- Remove the old vanity if replacing. Disconnect plumbing, cut caulk lines with a utility knife, and check for damage to the wall or floor that needs repair before proceeding.
- Check floor level. Use a 4-foot level across the installation area. If the floor slopes more than 1/4 inch over 4 feet, use shims under the vanity base to level it, unlevel vanities cause doors to swing open or closed on their own and stress joinery.
- Locate studs. Teak is dense and heavy: a typical 48-inch vanity can weigh 150+ pounds before adding a stone countertop. Wall-mounted vanities must anchor into studs, not just drywall. Use a stud finder and mark locations with painter’s tape.
Installation process:
- Position the vanity and check for level front-to-back and side-to-side. Adjust shims as needed.
- Secure to wall studs. For freestanding vanities, drive 3-inch wood screws through the back rail into studs. For wall-mounted units, use a ledger board or the manufacturer’s mounting bracket system, securing with appropriate fasteners (lag screws into studs for solid support).
- Connect plumbing. Many home improvement veterans recommend flexible braided supply lines for easier connection and reduced leak risk compared to rigid copper. Apply pipe thread sealant or Teflon tape to threaded connections. Hand-tighten, then snug with a wrench, avoid overtightening, which can crack fittings.
- Install the countertop and sink per manufacturer instructions. Stone tops are heavy and typically require adhesive and/or clips. Undermount sinks need adequate support and a proper seal with silicone.
- Seal the perimeter. Run a bead of silicone caulk (not acrylic latex) where the vanity meets the wall and floor. Silicone handles moisture better and remains flexible. Smooth with a wet finger or caulk tool.
Safety and permits: Wall-mounted vanities require solid backing or blocking in the wall, not just drywall anchors. If your installation involves moving plumbing or electrical (like adding a GFCI outlet), most jurisdictions require permits and inspections. Check local codes before starting work that goes beyond a simple swap.
Caring for and Maintaining Your Teak Vanity
Teak’s low-maintenance reputation is earned, but it’s not zero-maintenance. The wood performs best with basic, consistent care.
Daily and weekly care:
- Wipe up spills and splashes with a soft cloth. While teak resists water, toothpaste, soap scum, and cosmetics can build up and dull the finish.
- Clean with mild soap and water. Use a damp microfiber cloth and a drop of dish soap for routine cleaning. Avoid ammonia-based cleaners, bleach, or abrasive pads, they can strip natural oils or scratch the surface.
- Dry after cleaning. A quick wipe with a dry towel prevents water spots and maintains the finish.
Periodic maintenance (every 6–12 months):
- Reapply oil finish if your vanity uses one. Clean the surface thoroughly, let it dry, then apply teak oil or tung oil with a lint-free cloth, following the grain. Wipe off excess after 15–20 minutes. This restores luster and replenishes protective oils.
- Inspect hardware and hinges. Tighten loose screws, lubricate soft-close mechanisms if they’re sticking, and check drawer glides for smooth operation.
- Check caulk lines. Bathroom caulk degrades over time. Re-caulk any gaps or cracks to prevent water from seeping behind the vanity.
Addressing wear and damage:
- Light scratches can often be buffed out with fine-grit sandpaper (220-grit) and re-oiled. Sand lightly in the direction of the grain.
- Water rings or stains: Rub gently with a paste of baking soda and water, rinse, dry, and re-oil.
- Deep gouges or structural damage may require professional repair or replacement of affected components.
What to avoid:
- Harsh chemicals: No acetone, paint thinner, or strong solvents.
- Excessive water exposure: Don’t let standing water sit on the surface.
- Direct heat: Keep curling irons, straighteners, and other hot tools off the teak surface to prevent scorching.
Cost Considerations and Where to Buy
Teak vanities sit at the higher end of the price spectrum for bathroom cabinetry, reflecting material cost, craftsmanship, and durability.
Price ranges (as of early 2026, subject to regional and market variation):
- Entry-level teak vanities (smaller single-sink units, simpler construction): $800–$1,500
- Mid-range options (quality joinery, Grade A teak, soft-close hardware): $1,500–$3,500
- High-end and custom pieces (hand-crafted, integrated stone tops, designer hardware): $3,500–$7,000+
These figures typically cover the vanity cabinet only. Add costs for countertops (stone, quartz, or solid-surface starting around $50–$150 per square foot installed), sinks ($100–$800 depending on type and brand), faucets ($150–$600), and installation labor if you’re hiring out (typically $300–$800 for a straightforward swap, more for plumbing or electrical modifications).
Where to buy:
- Specialty bathroom retailers often carry curated selections and provide design consultation. Expect higher prices but better service and return policies.
- Online marketplaces (Wayfair, Overstock, Amazon) offer broader selection and competitive pricing but require careful vetting of seller reviews and return terms. Shipping costs for heavy furniture can be substantial.
- Local custom cabinetmakers can build to exact specifications and room dimensions. Cost is higher, but you get precise fit and quality control. Bring measurements, photos, and a clear budget.
- Salvage and reclaimed sources occasionally stock teak vanities or raw teak lumber. This route requires more DIY skill but can yield unique pieces at lower cost.
Evaluating value: A well-made teak vanity should last 20+ years with proper care. Amortized over that lifespan, the cost-per-year compares favorably to cheaper particleboard or low-grade wood vanities that need replacement every 5–10 years. Factor in the material’s water resistance, timeless appearance, and resale value when weighing the investment. Browsing curated teak vanity galleries can help clarify which styles and features justify the price for your specific needs.